Showing posts with label tricks. Show all posts
Showing posts with label tricks. Show all posts
Sunday, September 21, 2014
Huawei Ascend Y210 Tips and Tricks
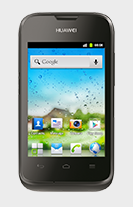
Here are some How Tos for your Huawei Ascend Y210. These How Tos may still not yet complete and I am finding some time to work on the others:
We have our own reasons why we factory reset our device. Maybe we want to delete all the files and restore the device to its original state. It could also be the device may be malfunctioning or so slow and it needs to be reset.
Restoring the default settings or factory reset your Huawei Ascend Y210 will delete all your files. It is recommended to backup your important files on your computer before attempting to reset your device.
1. Go to Settings.
2. Select Privacy, and tap Factory data reset.
3. There should a message box appear on the Lcd, tap on Reset phone.
4. To confirm the reset tap Erase everything.
The phone should restart itself and restore the settings to its original factory settings.
Restoring the default settings or factory reset your Huawei Ascend Y210 will delete all your files. It is recommended to backup your important files on your computer before attempting to reset your device.
1. Go to Settings.
2. Select Privacy, and tap Factory data reset.
3. There should a message box appear on the Lcd, tap on Reset phone.
4. To confirm the reset tap Erase everything.
The phone should restart itself and restore the settings to its original factory settings.
How to Extend Battery Life of Huawei Ascend Y210
Battery Life depends on how you use your device. For Huawei Ascend Y210 device, if you want to save your battery to last longer hours, you may need to adjust your settings. Follow these suggestions:
• Lessen the Lcd brightness and the Lcd lock timeout.
• Turn down your device volume with the volume keys.
• Close any apps or features when you are done using it so they will not continuously running in the background.
• Turn off the network connection if you are out of range so that your device will stop searching for a network signal.
• You should use the latest version of the software update. Software updates improves some features and fixes some bugs on the previous software version.
How to Import Contacts from SIM Card on Huawei Ascend Y210
Contacts is very important for everyone of us. We cant connect to our friends without a contact number. If you have a new phone, saving contacts on the phone one by one is so hassle. But if you have save your contacts on a Sim Card, then you can transfer your contacts from your SIM Card to your Huawei Ascend Y210.
Follow these steps on how to import contacts from SIM Card:
1. On the contact list Lcd, tap on the 3-horizontal icon.
2. Then select Manage Contacts.
3. Tap Copy from SIM card. (Make sure that your SIM card is inserted on your phone.)
4. Touch one contact to individually import, or tap Select All to import all your contacts.
5. Then tap Copy.
Note: If you have more than one account on your phone, tap on the account you want to import the contacts.

Thursday, September 18, 2014
LG Lucid 2 Tips and Tricks
How to Factory Reset (Hard Reset) LG Lucid 2
We have our own reasons why we factory reset our device. Maybe we want to delete all the files and restore the device to its original state. It could also be the device may be malfunctioning or so slow and it needs to be reset.
Restoring the default settings or factory reset your LG Lucid 2 will delete all your existing files. It is recommended to backup your important files on your computer before attempting to reset your device.
The steps below are the instructions on how to factory reset your LG Lucid 2:
Step 1. On your HomeLcd, tap on MENU icon.
Step 2. Select Settings, then select Backup & Reset option.
Step 3. Under Personal Data, tap on Factory Data Reset.
Step 4. Read warning carefully before tapping the Reset phone.
Step 5. If you want to proceed in resetting your device, tap on Erase Everything to confirm the Factory Reset.
Now, you just need to wait while your device is resetting. It should reboot itself and you will have a new start on your LG Lucid 2.
How to Extend Battery Life of LG Lucid 2
Read More..
We have our own reasons why we factory reset our device. Maybe we want to delete all the files and restore the device to its original state. It could also be the device may be malfunctioning or so slow and it needs to be reset.
Restoring the default settings or factory reset your LG Lucid 2 will delete all your existing files. It is recommended to backup your important files on your computer before attempting to reset your device.
The steps below are the instructions on how to factory reset your LG Lucid 2:
Step 1. On your HomeLcd, tap on MENU icon.
Step 2. Select Settings, then select Backup & Reset option.
Step 3. Under Personal Data, tap on Factory Data Reset.
Step 4. Read warning carefully before tapping the Reset phone.
Step 5. If you want to proceed in resetting your device, tap on Erase Everything to confirm the Factory Reset.
Now, you just need to wait while your device is resetting. It should reboot itself and you will have a new start on your LG Lucid 2.
If your LG Lucid 2 is unresponsive, then you may need to do the Hard Reset.
- Press and hold the Power button/Lock Key and Volume Down Key at the same time.
- Hold these buttons until you see the Factory Hard Reset.
- Press the Power Key continue or the Volume Keys to cancel.
- Press the Power Key again to confirm the factory reset, or the Volume Keys to cancel.
- Wait for a few minutes while your phone performing the hard reset. It will turn on in a while..
Battery Life depends on how you use your device. For LG Lucid 2 device, if you want to save your battery to last longer hours, you may need to adjust your settings. Follow these suggestions:
• Monitor what uses your phone battery. .
- On your HomeLcd, tap on the Application tab > then select Settings > About phone > Battery use.
• Lessen the Lcd brightness and the Lcd lock timeout.
• Turn down your device volume with the volume keys.
• Close any apps or features when you are done using it so they will not continuously running in the background.
• Turn off the network connection if you are out of range so that your device will stop searching for a network signal.
• You should use the latest version of the software update. Software updates improves some features and fixes some bugs on the previous software version.
• Turn off the camera flash.
• The camera viewfinder can be a power drain, so after youve finished taking photos.
How to Turn On and Connect to Wi-Fi on LG Lucid 2
The steps below will let you show how to connect to a wi-fi network whenever youre out of range. However, if you want to connect to a secured network, you may need to obtain the networks password. Heres how to connect to a wi-fi network on LG Lucid 2.
1. On your Home Lcd, tap on the Applications tab.
2. Then select Settings.
3. Choose Wireless & Networks, then Wi-Fi settings.
4. Tap Wi-Fi to turn it on and it will begin scanning for available Wi-Fi networks.
5. There should a list of available Wi-Fi networks will be displayed. If it is secured, then it has a locked icon.
6. Touch on the network to you want to connect.
7. If the network is not secured, then confirm by tapping Connect.
8. If the network is secured, then enter the password then tap Connect.
The status bar displays icons that indicate Wi-Fi status.
How to Uninstall Apps on LG Lucid 2
There will come a time that you no longer want to play the app that you have downloaded and want to remove it from your phone (LG Lucid 2). If this time will come, you just need to uninstall or disable the app so it will be removed on your phone.
• Monitor what uses your phone battery. .
- On your HomeLcd, tap on the Application tab > then select Settings > About phone > Battery use.
• Lessen the Lcd brightness and the Lcd lock timeout.
• Turn down your device volume with the volume keys.
• Close any apps or features when you are done using it so they will not continuously running in the background.
• Turn off the network connection if you are out of range so that your device will stop searching for a network signal.
• You should use the latest version of the software update. Software updates improves some features and fixes some bugs on the previous software version.
• Turn off the camera flash.
• The camera viewfinder can be a power drain, so after youve finished taking photos.
The steps below will let you show how to connect to a wi-fi network whenever youre out of range. However, if you want to connect to a secured network, you may need to obtain the networks password. Heres how to connect to a wi-fi network on LG Lucid 2.
1. On your Home Lcd, tap on the Applications tab.
2. Then select Settings.
3. Choose Wireless & Networks, then Wi-Fi settings.
4. Tap Wi-Fi to turn it on and it will begin scanning for available Wi-Fi networks.
5. There should a list of available Wi-Fi networks will be displayed. If it is secured, then it has a locked icon.
6. Touch on the network to you want to connect.
7. If the network is not secured, then confirm by tapping Connect.
8. If the network is secured, then enter the password then tap Connect.
The status bar displays icons that indicate Wi-Fi status.
How to Uninstall Apps on LG Lucid 2
There will come a time that you no longer want to play the app that you have downloaded and want to remove it from your phone (LG Lucid 2). If this time will come, you just need to uninstall or disable the app so it will be removed on your phone.
Uninstalling apps is also necessary if you have less than 10% of space available on your memory, since your phone cannot receive new messages.
Follow these steps on how to uninstall your apps.
Follow these steps on how to uninstall your apps.
- Tap on
 .
.
- Select Apps tab, then Settings.
- Then choose Application Manager.
- Once all applications appear, scroll to and select the application you want to uninstall.
- Tap Uninstall.
How to Share Your Data Connection Using USB
By the Mobile Broadband Connect feature on your LG Lucid 2, you can share the phones mobile data connection using a USB.
1. In the Application list, select Settings.
1. In the Application list, select Settings.
2. Then tap on More.
3. From the Tethering & Networks tab, tap Mobile Broadband Connect.
Note: This setting is greyed out if not connected via USB.
3. From the Tethering & Networks tab, tap Mobile Broadband Connect.
Note: This setting is greyed out if not connected via USB.
When your phone is sharing its data connection, an icon appears in the status bar and as an ongoing notification in the notifications drawer.
Sunday, September 14, 2014
Motorola Atrix HD Tips and Tricks
How to Factory Reset Motorola Atrix HD
Performing factory reset on smartphones are often the last resort when worst comes to worst. When you do factory reset, all downloaded apps and phone settings will be deleted. Then youll have a clean phone just like the first time you opened it from its box. Make sure that you back up important files before you perform this. All data saved on your memory card will not be deleted though. Heres how you do a factory reset on Motorola Atrix HD.
How to Update Motorola Atrix HD
1. On your devices Lcd, tap on Apps and go to Settings menu
 .
.
2. Then select About phone..
3. Then tap System updates.
Make sure that your phone is connected to the Internet to install the update successfully.
How to Uninstall and Reinstall Apps on Motorola Atrix HD
There will come a time that you no longer want to play the app that you have downloaded and want to remove it from your phone (Motorola Droid Razr HD). If this time will come, you just need to uninstall or disable the app so it will be removed on your phone.
Follow these steps on how to uninstall and reinstall your apps.
To uninstall an app:
Disabling the app will remove it from your menu. If you want to Enable it again, just reopen the window and tap Enable.
In case the app locks up your phone as you turn it on, just restart your phone in Safe Mode. Turn off your phone and turn it back after a minute. If you see a Motorola logo during the power up, press and hold both volume keys until you see the home Lcd, with Safe Mode in the lower left. Then you may try removing the app.
To reinstall an app:
If the app is from Google play store, simply go to Apps > Play Store > My apps. From there you can see your apps ready to download again.
How to Add/Remove/Resize Widgets and Shortcuts on Motorola Atrix HD
Read More..
Performing factory reset on smartphones are often the last resort when worst comes to worst. When you do factory reset, all downloaded apps and phone settings will be deleted. Then youll have a clean phone just like the first time you opened it from its box. Make sure that you back up important files before you perform this. All data saved on your memory card will not be deleted though. Heres how you do a factory reset on Motorola Atrix HD.
1. On your devices Lcd, tap on Appsand go to Settings menu.
2. Then go to Privacy.
3. Select on Factory Reset and choose Reset Phone.
How to Extend Battery Life of Motorola Atrix HD
and go to Settings menu.2. Then go to Privacy.
3. Select on Factory Reset and choose Reset Phone.
How to Extend Battery Life of Motorola Atrix HD
Battery Life depends on how you use your device. For Motorola Atrix HD device, if you want to save your battery to last longer hours, you may need to adjust your settings. Follow these suggestions:
• To see whats using your battery more, go to Settings > Battery. If you want to set an automatic rules of saving more battery, tap on Apps, and select Smartactions.
• Turn down your device volume with the volume keys.
• Close any apps or features when you are done using it so they will not continuously running in the background.
• Turn off the network connection if you are out of range so that your device will stop searching for a network signal.
• You should use the latest version of the software update. Software updates improves some features and fixes some bugs on the previous software version.
• Turn off the camera flash.
• The camera viewfinder can be a power drain, so after youve finished taking photos, press the left arrow key.
• To see whats using your battery more, go to Settings > Battery. If you want to set an automatic rules of saving more battery, tap on Apps, and select Smartactions.
• Turn down your device volume with the volume keys.
• Close any apps or features when you are done using it so they will not continuously running in the background.
• Turn off the network connection if you are out of range so that your device will stop searching for a network signal.
• You should use the latest version of the software update. Software updates improves some features and fixes some bugs on the previous software version.
• Turn off the camera flash.
• The camera viewfinder can be a power drain, so after youve finished taking photos, press the left arrow key.
There will come a time that Motorola or your Internet Service Provider will give a software update for your Motorola Droid Atrix HD device. The update is needed to fix some bugs and for you to experience the newly added features. It may come by batch, but if you have not receive the update for a while, then you may need to manually check for the updates.
1. On your devices Lcd, tap on Apps
and go to Settings menu.2. Then select About phone..
3. Then tap System updates.
Make sure that your phone is connected to the Internet to install the update successfully.
How to Uninstall and Reinstall Apps on Motorola Atrix HD
There will come a time that you no longer want to play the app that you have downloaded and want to remove it from your phone (Motorola Droid Razr HD). If this time will come, you just need to uninstall or disable the app so it will be removed on your phone.
Follow these steps on how to uninstall and reinstall your apps.
To uninstall an app:
- Tap on Apps, then select the Gear icon or Settings.
- Select Apps, then tap All.
- Tap on the app you want to Disable or Uninstall.
Disabling the app will remove it from your menu. If you want to Enable it again, just reopen the window and tap Enable.
In case the app locks up your phone as you turn it on, just restart your phone in Safe Mode. Turn off your phone and turn it back after a minute. If you see a Motorola logo during the power up, press and hold both volume keys until you see the home Lcd, with Safe Mode in the lower left. Then you may try removing the app.
To reinstall an app:
If the app is from Google play store, simply go to Apps > Play Store > My apps. From there you can see your apps ready to download again.
How to Add/Remove/Resize Widgets and Shortcuts on Motorola Atrix HD
Adding Widgets on your HomeLcd will help you improve your productivity in using your Motorola Atrix HD. If you dont know what widgets means, Widgets are small applications that you can directly use on your HomeLcd. These will serve as your shortcut icon so will no longer need to access the Menu.
To add a Widgets and Shortcuts:
There are also app that include special widgets. If you want to download apps, just tap on Apps, then select Play Store.
To resize widgets:
To move or delete widgets and shortcuts:
To add a Widgets and Shortcuts:
- Go to Apps.
- Tap and hold on the app or widget.
- Drag it to one of your home Lcd pages.
- If you want to see all your apps and widgets, swipe the app Lcd to the left.
- Or you may also tap Apps or Widgets at the top.
- If you want to see all your favorite apps, just tap on the Star icon or Favorites.
- Tap on Add/Remove to edit your favorite apps.
There are also app that include special widgets. If you want to download apps, just tap on Apps, then select Play Store.
To resize widgets:
- Some widgets are resizeable, simply tap and hold on a widget you want to resize until it vibrates.
- Then drage the blue diamonds at the edges to change the size.
To move or delete widgets and shortcuts:
- Tap and hold on a widget you want to delete/move until it vibrates.
- Then drag it to another spot/page, you simply Remove at the top of the Lcd.
Monday, September 8, 2014
Nokia Lumia 720 Tips and Tricks
How to Hard Reset Nokia Lumia 720
There are two ways on how to reset your Nokia Lumia 720, it can be through the hard reset or soft reset. When you say hard reset it involves on the hardware part, so you need to remove the battery of you Nokia Lumia and reinsert it. Then turn on your device normally. This should refresh the content of your device but will not remove any data.
Software reset will return your device to its default settings. Like a brand new phone, no information or data saved on your device. This procedure will erase all your data save on your phone.
If your Nokia Lumia is frozen, it is recommended to perform the Hard Reset.
You can soft reset your Nokia Lumia in two ways. By accessing it through settings or doing the hard key combination.
Resetting through the settings:
Go to Settings > About > reset your phone.
Hard Key Combination:
Use this option if your device is locked and you dont know the code.
Note: Make sure that your Nokia Lumia is turned off.
Step 1. Press and hold the power key until it vibrates then release.
Step 2. Press and hold the down key volume. If the exclamation mark will be shown on the Lcd, you can now release the button.
Step 3. You need to input these key combination:
Volume Up > Volume Down > Power > Volume Down.
Your phone will reset and will boot up automatically. This might take a several minutes.
How to Import Contacts From Old Phone to New Phone (on iPhone, Samsung, HTC and Nokia)
Contacts is very important for everyone of us. We cant connect to our friends without a contact number. If you have a new phone, saving contacts on the phone one by one is so hassle. But now, theres an easy way how to transfer or import your contacts from your old phone to your new phone.
Use your PC to transfer contacts to your new phone. This process is applicable in several phone brands, including iPhone, Samsung, HTC and Nokia.
You just need an Internet Connection on your PC, your old and new phone and their own USB cable.
If you are not prompted with a pop-up window to install the PC Companion, you can also download the PC Companion here.
How to Extend Battery Life of Nokia Lumia 720
Battery Life depends on how you use your device. For Nokia Lumia 720 device, if you want to save your battery to last longer hours, you may need to adjust your settings. Follow these suggestions:
• Turn on the power-saving option on the device. Then lessen the Lcd brightness and the Lcd lock timeout. On the Home Screen, swipe left, then tap on the Gear Icon or Settings > Battery saver.
- Be reminded that when your phone goes into battery saver mode, you may not be able to change the settings of all apps.
- If you want to change the settings of the Battery saver, tap on Advanced.
• Turn down your device volume with the volume keys.
• Close any apps or features when you are done using it so they will not continuously running in the background.
• Turn off the network connection if you are out of range so that your device will stop searching for a network signal.
• You should use the latest version of the software update. Software updates improves some features and fixes some bugs on the previous software version.
• Turn off the camera flash.
• The camera viewfinder can be a power drain, so after youve finished taking photos, press the left arrow key.
How to Take a Screenshot on Nokia Lumia 720
Did you just created a nice piece of art on your new Nokia Lumia 720 phone? Or perhaps youve just personalized your Lcd and want others to know how youve come up with it.Well, take a Lcdshot and brag it to your friends. Heres how you can capture a Lcdshot of your Nokia device.
Read More..
There are two ways on how to reset your Nokia Lumia 720, it can be through the hard reset or soft reset. When you say hard reset it involves on the hardware part, so you need to remove the battery of you Nokia Lumia and reinsert it. Then turn on your device normally. This should refresh the content of your device but will not remove any data.
Software reset will return your device to its default settings. Like a brand new phone, no information or data saved on your device. This procedure will erase all your data save on your phone.
If your Nokia Lumia is frozen, it is recommended to perform the Hard Reset.
You can soft reset your Nokia Lumia in two ways. By accessing it through settings or doing the hard key combination.
Resetting through the settings:
Go to Settings > About > reset your phone.
Hard Key Combination:
Use this option if your device is locked and you dont know the code.
Note: Make sure that your Nokia Lumia is turned off.
Step 1. Press and hold the power key until it vibrates then release.
Step 2. Press and hold the down key volume. If the exclamation mark will be shown on the Lcd, you can now release the button.
Step 3. You need to input these key combination:
Volume Up > Volume Down > Power > Volume Down.
Your phone will reset and will boot up automatically. This might take a several minutes.
How to Import Contacts From Old Phone to New Phone (on iPhone, Samsung, HTC and Nokia)
Contacts is very important for everyone of us. We cant connect to our friends without a contact number. If you have a new phone, saving contacts on the phone one by one is so hassle. But now, theres an easy way how to transfer or import your contacts from your old phone to your new phone.
Use your PC to transfer contacts to your new phone. This process is applicable in several phone brands, including iPhone, Samsung, HTC and Nokia.
You just need an Internet Connection on your PC, your old and new phone and their own USB cable.
Then you need to install the PC Companion program. This is a free application and the installation files are already saved on your new phone. This program can also be used in updating your phone software.
Please note that if you are using the Microsoft Windows 7 operating system on your PC, make sure that the AutoPlay setting is enabled.
To check your settings:
Click Start > Control Panel, then type "autoplay" on the search box. Click the AutoPlay, and mark the check box Use AutoPlay for all media and devices.
Installing the PC Companion:
Installing the PC Companion:
- Turn on your new Phone and connect it to your PC.
- On your new Phone, tap "Install" to install PC Companion on the PC.
- On your computer, if a pop-up window that appears notifies you about available PC Software, select Run Startme.exe.
- Then click Install to start the installation and then follow the instructions to complete the installation.
If you are not prompted with a pop-up window to install the PC Companion, you can also download the PC Companion here.
Transferring your contacts to your new phone:
- Make sure that PC Companion is installed on your PC.
- Open the PC Companion application on your PC.
- Then click Contacts Setup and follow the instructions to transfer your contacts.
How to Extend Battery Life of Nokia Lumia 720
Battery Life depends on how you use your device. For Nokia Lumia 720 device, if you want to save your battery to last longer hours, you may need to adjust your settings. Follow these suggestions:
• Turn on the power-saving option on the device. Then lessen the Lcd brightness and the Lcd lock timeout. On the Home Screen, swipe left, then tap on the Gear Icon or Settings > Battery saver.
- Be reminded that when your phone goes into battery saver mode, you may not be able to change the settings of all apps.
- If you want to change the settings of the Battery saver, tap on Advanced.
• Turn down your device volume with the volume keys.
• Close any apps or features when you are done using it so they will not continuously running in the background.
• Turn off the network connection if you are out of range so that your device will stop searching for a network signal.
• You should use the latest version of the software update. Software updates improves some features and fixes some bugs on the previous software version.
• Turn off the camera flash.
• The camera viewfinder can be a power drain, so after youve finished taking photos, press the left arrow key.
How to Take a Screenshot on Nokia Lumia 720
Did you just created a nice piece of art on your new Nokia Lumia 720 phone? Or perhaps youve just personalized your Lcd and want others to know how youve come up with it.Well, take a Lcdshot and brag it to your friends. Heres how you can capture a Lcdshot of your Nokia device.
1. Press on the Power key on the right side of the phone and the Start key simultaneously for a few seconds.
2. To see the Lcdshot, tap on Photos, the Albums and select Screenshots.
3. Tap and hold the Lcdshot you wish to send and then tap on share on the options.
There you have it. Youve just captured a Lcdshot.
How to Scan Codes on Nokia Lumia 720
Nokias latest installment of smartphone, the Lumia 720, allows you to scan QR codes, barcodes and book and DVD covers. Your device will give you further info after you scan the codes. Heres how you can make use of this feature.
1. First, you need to tap the Search icon
2. Then tap on
3. And point the camera at the code. Make sure to keep the camera steady on the code and should be completely visible in the camera viewfinder.
How to Make a Conference Call on Nokia Lumia 720
Now, if you want to have a private conversation with someone while youre on a conference call, just tap
Smartphones these days can now share its mobile data connection and act as a portable Wi-Fi hotspot. And like those high-end gadgets, Nokia Lumia 720 is sure to let you experience the benefits of making it as a portable Wi-Fi hotspot. Heres how you can make your Nokia Lumia 720 phone the next Wi-Fi hotspot.
1. On your Start Lcd, swipe left, and tap Settings.
Wait for few seconds and your phone will start broadcasting its WiFi network name. Now you’re ready to connect your other device to your portable mobile wifi hotspot.
How to Track and Delete Files Remotely on Your Lost Nokia Lumia 720
Did you lose your phone? Or misplaced it? Worried about your files? So many questions but only one answer. Go to www.windowsphone.com. In this site you can track your Windows phone, delete your files, make your phone ring, and locked your phone to show a message to return it.
Find my Phone will make your life easier to find it or it can also prevent other person from using it without your consent.
How to Track your Phone / Map Location:
How to make your phone ring:
How to Lock your phone and show a message:
How to Scan Codes on Nokia Lumia 720
Nokias latest installment of smartphone, the Lumia 720, allows you to scan QR codes, barcodes and book and DVD covers. Your device will give you further info after you scan the codes. Heres how you can make use of this feature.
1. First, you need to tap the Search icon
2. Then tap on
3. And point the camera at the code. Make sure to keep the camera steady on the code and should be completely visible in the camera viewfinder.
How to Make a Conference Call on Nokia Lumia 720
Conference calling is a network service. The maximum number of participants involve in a conference call varies by network service provider. Nokia Lumia 720 supports conference call between two or more people. Well, heres how you can make a conference call using your Nokia Lumia 720 phone.
1. Call the first participant of the conference call.
2. To make a call to another person, press  , and make the call in the normal way.
3. When your call is answered, just tap ![merge]() .
.
4. If you want to add another person to the call, just tap ![add]() , then call another person and tap
, then call another person and tap ![merge]() .
.
, and make the call in the normal way.Now, if you want to have a private conversation with someone while youre on a conference call, just tap![private]() and the persons name or number. The conference call is put on hold while other participants continue the conference call. Tap on
and the persons name or number. The conference call is put on hold while other participants continue the conference call. Tap on![merge]() to return to the conference call.
to return to the conference call.
How to Make Your Nokia Lumia 720 a Wi-Fi Hotspot
1. On your Start Lcd, swipe left, and tap
Settings.2. Then select Internet sharing.
3. Switch the Sharing to On.
4. If you want to change the name of your connection, tap Setup > Broadcast name, then enter the name.
3. Switch the Sharing to On.
4. If you want to change the name of your connection, tap Setup > Broadcast name, then enter the name.
5. If you want to secure your Wi-Fi hotspot, then you can also type in a password for the connection.
6. Then select the connection on the other device.
Wait for few seconds and your phone will start broadcasting its WiFi network name. Now you’re ready to connect your other device to your portable mobile wifi hotspot.
Note: The other device uses data from your data plan, which may result in data traffic costs. For info on availability and costs, contact your network service provider.
Did you lose your phone? Or misplaced it? Worried about your files? So many questions but only one answer. Go to www.windowsphone.com. In this site you can track your Windows phone, delete your files, make your phone ring, and locked your phone to show a message to return it.
Find my Phone will make your life easier to find it or it can also prevent other person from using it without your consent.
How to Track your Phone / Map Location:
- Go to www.windowsphone.com.
- Point your mouse on "Explore My Phone" and click Find My Phone.
- Sign in with the same Microsoft account you used to sign in on your phone.
- If you are not seeing the latest location of your phone, click Refresh.
- You can also print the hard copy of your phone location, just click Print.
- Click Center on Map if you lost the location of your phone.
How to make your phone ring:
- While you are sign in on www.windowsphone.com, click on Ring.
- Just follow the instructions to make your phone ring.
How to Erase your phone:
- While you are sign in on www.windowsphone.com, click on Erase.
- If you are sure to erase your phone, click on Yes! Erase my phone immediately check box.
- To confirm click Erase.
How to Lock your phone and show a message:
- While you are sign in on www.windowsphone.com, click on Lock.
- Just follow the instructions to lock your phone ring.
- If you dont have a password then you need to create one, you will use it to unlock your phone if you get it back.
How to Delete or Uninstall an App on Nokia Lumia 720
Deleting apps on your phone can free up your phone memory storage. So if think youre phone is a bit too crowdy and if some apps lurking in it deserves to be out of your phone memory then you might want to consider uninstalling those apps you no longer want to use. Heres how you can clean up and uninstall an app on Nokia Lumia 720.
1. On your devices start Lcd, swipe left to the all apps menu.
2. Then simply tap and hold an app and tap uninstall. Take note that you might not be able to remove some apps especially those that came with your phone.
As easy as that. If you wish to reinstall the app without buying it again, then you can do as as long as it is available in Store.
How to Personalize the Start Screen on Nokia Lumia 720
Do you want to get easy access on your most-used apps? Then pin your favorite apps, websites, contacts and much more right on your Nokia Lumia 720 start Lcd. Here are some ways on how you can personalize your start Lcd and make it look neater.
To pin an app:
1. On your devices Lcd swipe left to go to the apps menu.
2. Then tap and hold the app you wish to pin on the start Lcd.
3. And tap pin to Start.
To pin a contact:
1.First tap People.
2. Then tap and hold the contact you wish to pin on the start Lcd.
3. And tap pin to start. By pinning your a contact on the start Lcd, youll be able
to see their feed updates on the tile and you can call them directly from the
start Lcd.
To pin a website:
1. Go to a website that you want to access instantly .
2. Then tap and choose pin to start.
To move a tile:
1. Just tap and hold the tile.
2. Then drag and drop it to the new location and finally tap the Lcd.
To resize a tile:
1. Tap and hold the tile you want to resize
2. And tap the arrow icon.
To unpin a tile:
1. Tap and hold the tile.
2. And tap
How to Download Apps on Nokia Lumia 720
Do want to jampacked your Lumia 720 with cool apps and games. Then try checking out their own version of app store to download free apps, games and other stuff for your Lumia 720 phone. Heres how to download those stuff on your phone.
1. First tap the Store icon on your device.
2. Then tap an item to view its details like the price, description, rating and etc.
3. If the said item has a price, tap buy or if its available for free at a limited time, tap try. If its free, go ahead and tap install.
4. If youre not signed in to a Microsoft account, then sign in now.
5. And just follow the on-Lcd instructions to complete the download.
When the download is complete, you can open or view the item, or continue browsing for more items at the store. But even if youre still downloading the item, you can continue to browse for more items and even add an item to your download queue. To view your download queue just tap the download notification at the bottom of the main view. If you want to pause the downloading, tap and hold the downloading item and tap pause. Tap resume to continue the download.
How to Create a Start Screen for Kids on Nokia Lumia 720
Deleting apps on your phone can free up your phone memory storage. So if think youre phone is a bit too crowdy and if some apps lurking in it deserves to be out of your phone memory then you might want to consider uninstalling those apps you no longer want to use. Heres how you can clean up and uninstall an app on Nokia Lumia 720.
1. On your devices start Lcd, swipe left to the all apps menu.
2. Then simply tap and hold an app and tap uninstall. Take note that you might not be able to remove some apps especially those that came with your phone.
As easy as that. If you wish to reinstall the app without buying it again, then you can do as as long as it is available in Store.
How to Personalize the Start Screen on Nokia Lumia 720
Do you want to get easy access on your most-used apps? Then pin your favorite apps, websites, contacts and much more right on your Nokia Lumia 720 start Lcd. Here are some ways on how you can personalize your start Lcd and make it look neater.
To pin an app:
1. On your devices Lcd swipe left to go to the apps menu.
2. Then tap and hold the app you wish to pin on the start Lcd.
3. And tap pin to Start.
To pin a contact:
1.First tap
People.2. Then tap and hold the contact you wish to pin on the start Lcd.
3. And tap pin to start. By pinning your a contact on the start Lcd, youll be able
to see their feed updates on the tile and you can call them directly from the
start Lcd.
To pin a website:
1. Go to a website that you want to access instantly .
2. Then tap
and choose pin to start.To move a tile:
1. Just tap and hold the tile.
2. Then drag and drop it to the new location and finally tap the Lcd.
To resize a tile:
1. Tap and hold the tile you want to resize
2. And tap the arrow icon.
To unpin a tile:
1. Tap and hold the tile.
2. And tap
How to Download Apps on Nokia Lumia 720
Do want to jampacked your Lumia 720 with cool apps and games. Then try checking out their own version of app store to download free apps, games and other stuff for your Lumia 720 phone. Heres how to download those stuff on your phone.
1. First tap the Store icon
on your device.2. Then tap an item to view its details like the price, description, rating and etc.
3. If the said item has a price, tap buy or if its available for free at a limited time, tap try. If its free, go ahead and tap install.
4. If youre not signed in to a Microsoft account, then sign in now.
5. And just follow the on-Lcd instructions to complete the download.
When the download is complete, you can open or view the item, or continue browsing for more items at the store. But even if youre still downloading the item, you can continue to browse for more items and even add an item to your download queue. To view your download queue just tap the download notification at the bottom of the main view. If you want to pause the downloading, tap and hold the downloading item and tap pause. Tap resume to continue the download.
How to Create a Start Screen for Kids on Nokia Lumia 720
With Kids Corner feature on Nokia Lumia 720, you can now let your kids use your Lumia phone without worrying that they might delete important files on your phone or purchase apps without your consent. Just create their own start Lcd and personalise it with their favorite apps or games. Heres how to create a start Lcd for your kids on Nokia Lumia 720.
1. On your devices start Lcd, swipe left and tap Settings.
2. Then tap on Kids corner.
3. Now you can create a fun and safe start Lcd for your kids. Choose which content your kids can use and even create a password so they cant access your own start Lcd.
4. To let your kids buy game points or define a Wallet PIN, you must enter the Wallet PIN to make each purchase. To define a Wallet PIN, swipe left on the start Lcd and tap Wallet >
 > settings+PIN.
5. To turn off kids corner, swipe left on your start Lcd and tapSettings. Then switch kids corner off.
If you want to go back to your own start Lcd just press the power key twice and swipe up on your own lockLcd. To go back to kids corner, swipe left on your start Lcd and swipe up on the kids lockLcd.
1. On your devices start Lcd, swipe left and tap
Settings.2. Then tap on Kids corner.
3. Now you can create a fun and safe start Lcd for your kids. Choose which content your kids can use and even create a password so they cant access your own start Lcd.
4. To let your kids buy game points or define a Wallet PIN, you must enter the Wallet PIN to make each purchase. To define a Wallet PIN, swipe left on the start Lcd and tap
Wallet >> settings+PIN.5. To turn off kids corner, swipe left on your start Lcd and tap
Settings. Then switch kids corner off.If you want to go back to your own start Lcd just press the power key twice and swipe up on your own lockLcd. To go back to kids corner, swipe left on your start Lcd and swipe up on the kids lockLcd.
Friday, September 5, 2014
Nokia Lumia 820 Tips and Tricks
How to Factory Reset (Hard Reset) Nokia Lumia 820
There are two ways on how to reset your Nokia Lumia 820, it can be through the hard reset or soft reset. When you say hard reset it involves on the hardware part, so you need to remove the battery of you Nokia Lumia 820 and reinsert it. Then turn on your device normally. This should refresh the content of your device but will not remove any data.
Software reset will return your device to its default settings. Like a brand new phone, no information or data saved on your device. This procedure will erase all your data save on your phone.
If your Nokia Lumia 820 is frozen, it is recommended to perform the Hard Reset.
You can soft reset your Nokia Lumia in two ways. By accessing it through settings or doing the hard key combination.
Resetting through the settings:
Go to Settings > About > reset your phone.
Hard Key Combination:
Use this option if your device is locked and you dont know the code.
Note: Make sure that your Nokia Lumia is turned off.
Step 1. Press and hold the power key until it vibrates then release.
Step 2. Press and hold the down key volume. If the exclamation mark will be shown on the screen, you can now release the button.
Step 3. You need to input these key combination:
Volume Up > Volume Down > Power > Volume Down.
Your phone will reset and will boot up automatically. This might take a several minutes.
How to Update Your Nokia Lumia 820
How to Track and Delete Files Remotely on Your Lost Windows Phone
Read More..
There are two ways on how to reset your Nokia Lumia 820, it can be through the hard reset or soft reset. When you say hard reset it involves on the hardware part, so you need to remove the battery of you Nokia Lumia 820 and reinsert it. Then turn on your device normally. This should refresh the content of your device but will not remove any data.
Software reset will return your device to its default settings. Like a brand new phone, no information or data saved on your device. This procedure will erase all your data save on your phone.
If your Nokia Lumia 820 is frozen, it is recommended to perform the Hard Reset.
You can soft reset your Nokia Lumia in two ways. By accessing it through settings or doing the hard key combination.
Resetting through the settings:
Go to Settings > About > reset your phone.
Hard Key Combination:
Use this option if your device is locked and you dont know the code.
Note: Make sure that your Nokia Lumia is turned off.
Step 1. Press and hold the power key until it vibrates then release.
Step 2. Press and hold the down key volume. If the exclamation mark will be shown on the screen, you can now release the button.
Step 3. You need to input these key combination:
Volume Up > Volume Down > Power > Volume Down.
Your phone will reset and will boot up automatically. This might take a several minutes.
There will come a time that Nokia or your Internet Service Provider (ISP) will give a software update for Nokia Lumia device. Verizon did update the Nokia Lumia 822 and has been already rolled out via OTA (Over The Air). The update may come by batch, but if you have not receive the update for a while, then you may need to manually check for the updates.
How to manually check for updates on your Nokia Lumia:
- Go to Settings, and select Phone Update.
- To check for the new updates just tap on Check for Updates.
You need to update your device to experience the improvements and some features added on your Nokia Lumia device.
How to Track and Delete Files Remotely on Your Lost Windows Phone
Did you lose your phone? Or misplaced it? Worried about your files? So many questions but only one answer. Go to www.windowsphone.com. In this site you can track your Windows phone, delete your files, make your phone ring, and locked your phone to show a message to return it.
How to make your phone ring:
How to Erase your phone:
How to Take a Photo Without Using the Camera Key on Nokia Lumia 820
Find my Phone will make your life easier to find it or it can also prevent other person from using it without your consent.
How to Track your Phone / Map Location:
- Go to www.windowsphone.com.
- Point your mouse on "Explore My Phone" and click Find My Phone.
- Sign in with the same Microsoft account you used to sign in on your phone.
- If you are not seeing the latest location of your phone, click Refresh.
- You can also print the hard copy of your phone location, just click Print.
- Click Center on Map if you lost the location of your phone.
- While you are sign in on www.windowsphone.com, click on Ring.
- Just follow the instructions to make your phone ring.
- While you are sign in on www.windowsphone.com, click on Erase.
- If you are sure to erase your phone, click on Yes! Erase my phone immediately check box.
- To confirm click Erase.
How to Lock your phone and show a message:
- While you are sign in on www.windowsphone.com, click on Lock.
- Just follow the instructions to lock your phone ring.
- If you dont have a password then you need to create one, you will use it to unlock your phone if you get it back.
Capturing vibrant photos in just a snap comes in handy these days. So why bother carry a separate camera when you can capture those moments with your phone? With Nokia Lumia 820 you can take photos and record videos even without using the camera key with the touch capture on its camera settings. Heres how you can do it.
1. On your devices start screen, swipe left.
2. Then tap on Settings menu.
3. Go to Applications and tap on photos+camera.
4. And select Tap screen to take pictures and videos.
To focus a specific object or area while taking a photo, tap the object/area on the screen and hold the phone still until that white box stops blinking. Now you can take photos by tapping your devices screen.
How to Import Contacts From Old Phone to New Phone (on iPhone, Samsung, HTC and Nokia)
Contacts is very important for everyone of us. We cant connect to our friends without a contact number. If you have a new phone, saving contacts on the phone one by one is so hassle. But now, theres an easy way how to transfer or import your contacts from your old phone to your new phone.
Use your PC to transfer contacts to your new phone. This process is applicable in several phone brands, including iPhone, Samsung, HTC and Nokia.
You just need an Internet Connection on your PC, your old and new phone and their own USB cable.
If you are not prompted with a pop-up window to install the PC Companion, you can also download the PC Companion here.
1. On your devices start screen, swipe left.
2. Then tap on Settings menu.
3. Go to Applications and tap on photos+camera.
4. And select Tap screen to take pictures and videos.
To focus a specific object or area while taking a photo, tap the object/area on the screen and hold the phone still until that white box stops blinking. Now you can take photos by tapping your devices screen.
Use your PC to transfer contacts to your new phone. This process is applicable in several phone brands, including iPhone, Samsung, HTC and Nokia.
You just need an Internet Connection on your PC, your old and new phone and their own USB cable.
Then you need to install the PC Companion program. This is a free application and the installation files are already saved on your new phone. This program can also be used in updating your phone software.
Please note that if you are using the Microsoft Windows 7 operating system on your PC, make sure that the AutoPlay setting is enabled.
To check your settings:
Click Start > Control Panel, then type "autoplay" on the search box. Click the AutoPlay, and mark the check box Use AutoPlay for all media and devices.
Installing the PC Companion:
Installing the PC Companion:
- Turn on your new Phone and connect it to your PC.
- On your new Phone, tap "Install" to install PC Companion on the PC.
- On your computer, if a pop-up window that appears notifies you about available PC Software, select Run Startme.exe.
- Then click Install to start the installation and then follow the instructions to complete the installation.
If you are not prompted with a pop-up window to install the PC Companion, you can also download the PC Companion here.
Transferring your contacts to your new phone:
- Make sure that PC Companion is installed on your PC.
- Open the PC Companion application on your PC.
- Then click Contacts Setup and follow the instructions to transfer your contacts.
Tuesday, September 2, 2014
Asus PadFone Infinity Tips and Tricks
How to Factory Reset Asus PadFone Infinity
Your phone is ready use and make/receive voice calls or transmit/receive data after installing the SIM card. But difference regions may have a different mobile networks available and need to reconfigure.
How to Use App Backup on ASUS PadFone Infinity
Backing app your apps and app data is now as easy as tapping a feature on ASUS Padfone Infinity. App Locker allows you to backup those installed apps and app data on both internal and external storage. Take note that this feature cant restore an app that requires authentication. Well. heres how you can backup your app using App Backup.
1. On the All apps screen, touch on App Backup.
2. Now accept the End User License Agreement.
3. After youve read the welcome message, touch Start to start using App Backup.
4. To back up your apps, tick the apps youd like to back up and determine a Backup Type whether to backup the app data only or both the app and app data.
5. Touch Backup on the upper right corner of the screen to start the backup.
6. To restore an app, just touch the Restore List to display the Restore List page.
7. Then touch a backup file you want to restore.
8. And touch OK on the confirmation page to start restoring an app.
Read More..
Resetting the factory settings will restore your phone to its default settings like when first open your phone.
- Tap on
 to go to All Apps screen.
- Then tap on Asus Splendid
 .
.
- On the screen, tap on "Set to default" to restore the default settings of your phone.
In Asus Splendid, you can also adjust the screen color temperature and contrast through Temperature and Enhancements.
To save the changes, tap on Done.
To Soft Reset Your Phone, just press the power key for 10 seconds to reset the system.
How to Configure/Connect Mobile Networks
- Tap on to go to All Apps screen.
- Select Settings
 .
.
- From the Settings screen tap More...
- Touch Mobile Settings.
How to Turn On a Wi-Fi
While connected to a Wi-Fi network, you can surf to internet and get in touch with your friends.
- Tap on to go to All Apps screen.
- Select Settings .
- Slide the Wi-Fi to switch on. When turn ON, your phone scans for available Wi-Fi networks.
- Tap on Wi-Fi to display the list of available networks.
- Tap the Network name to connect. Then enter the password if the network is secured.
How to Use SuperNote on ASUS PadFone
ASUS PadFone comes with a convenient app called the SuperNote. Just by its name, this app indeed allows you to create activities especially for those always on the go and loves to jut down notes or almost anything anytime. SuperNote is used for writing and painting, taking down notes, sending instant messages and whole lot more. Heres how to use ASUS SuperNote.
1. To open SuperNote, touch and go to the all apps screen.
and go to the all apps screen.2. Now touch SuperNote
3. Touch on New Notebook to begin and key in a name for the file.
4. Choose the notebook type and you can now start writing on the page.
How to Access ASUS Task Manager
Asus Task Manager shows a list of currently running utilities and apps on your ASUS PadFone Infinity. Like its Windows counterpart, you can also close running apps all at once right through the Task Manager. Heres how to access the ASUS Task Manager.
1. First, touchso you can go to the All apps screen.
so you can go to the All apps screen.2. Then touch Widgets to display the Widgets menu.
3. To display the Task Manager box on the home screen for easy access, touch and hold ASUS Task Manager.
4. Touch and hold the widget to display the sizing brackets and pull these either upward or downward to show the complete list of tasks.
5. And tap beside each running app to close the app or touch Close all to close all apps at once.
beside each running app to close the app or touch Close all to close all apps at once.Backing app your apps and app data is now as easy as tapping a feature on ASUS Padfone Infinity. App Locker allows you to backup those installed apps and app data on both internal and external storage. Take note that this feature cant restore an app that requires authentication. Well. heres how you can backup your app using App Backup.
1. On the All apps screen, touch on App Backup.
2. Now accept the End User License Agreement.
3. After youve read the welcome message, touch Start to start using App Backup.
4. To back up your apps, tick the apps youd like to back up and determine a Backup Type whether to backup the app data only or both the app and app data.
5. Touch Backup on the upper right corner of the screen to start the backup.
6. To restore an app, just touch the Restore List to display the Restore List page.
7. Then touch a backup file you want to restore.
8. And touch OK on the confirmation page to start restoring an app.
Friday, August 29, 2014
Sony Xperia Z2 Tablet Tips and Tricks
How to Factory Reset Sony Xperia Z2 Tablet
We have our own reasons why we factory reset our device. Maybe we want to delete all the files and restore the device to its original state. It could also be the device may be malfunctioning or so slow and it needs to be reset.
Restoring the default settings or factory reset your Sony Xperia Z2 tablet will delete all your files. It is recommended to backup your important files on your computer before attempting to reset your device.
There are two ways on how to reset your Sony Xperia Z2 tablet. One is to erase everything, wiping your files and restoring the default settings. The other one is to reset the device without deleting your personal data.
How To Reset Your Sony Xperia Z2 (Erasing All Your Files):
How To Reset Without Erasing Your Personal Data:
Warning: To avoid permanent damage to your device, do not restart your device while a reset procedure is underway.
How to Save Battery on Sony Xperia Z2 Tablet
Battery Life depends on how you use your device. For your Sony Xperia Z2 Tablet device, if you want to save your battery to last longer hours, you may need to adjust your settings. Follow these suggestions:
• Turn on the power-saving option on the device. Then lessen the screen brightness and the screen lock timeout. On the Homescreen, tap on Menu icon. Select Settings > Power management.
- Use the Stamina mode and Low battery mode features.
- To activate the STAMINA mode: While you are in the Power management, tap on Point icon next to STAMINA mode, then tap Activate.
• Turn down your device volume with the volume keys.
• Close any apps or features when you are done using it so they will not continuously running in the background.
• Turn off the network connection if you are out of range so that your device will stop searching for a network signal. To turn off the network go to Settings and turn off the Bluetooth and Wi-Fi.
• You should use the latest version of the software update. Software updates improves some features and fixes some bugs on the previous software version.
• Adjust your brightness level to low.
• Turn off the camera flash.
• If you have any live wallpaper, Disable it.
• Set the synchronization application to manual. You can also choose the automatic, but increase the synchronization intervals.
• If you want to listen to music, use the Sony original hands free device. It demand less battery power than your devices own loudspeakers.
How to Start the Smart Connect Application on Sony Xperia Z2 Tablet
Wouldnt it be nice if youre phone automatically plays your song list right when you step in your car? Or what about letting you show your whole day agenda the moment you arrive at your work table between 8-9am? These are just examples on how Sony Xperia Z2 Tablets Smart Connect app works. With this app, you can set an event to happen on your device at certain times or what will happen when you connect/disconnect accessories like headset or charger. Hereshow to use it.
1. On your devices home screen, tap on Menu icon
2. Look for Smart Connect and tap on it.
3. If its your first time opening the said app, tap on OK to close the introduction screen.
4. Go to Events tab and tap on the plus (+) icon.
5. If you are creating an event for the first time, tap OK again to close the introduction screen.
6. Add conditions under which you want to trigger the event. A condition could be the connection with an accessory, or a specific time interval, or both.
7. Tap Right Arrow icon to continue.
8. Add what you want to happen when you connect an accessory, and set other settings as desired.
9. Tap Right Arrow icon to continue.
10. Set an event name, then tap Finish.
How to Transfer Files Using Media Transfer Mode Via Wi-Fi on Sony Xperia Z2 Tablet
Transferring files in Sony Xperia Z2 Tablet is now made easy by using the Media Transfer Mode. You can easily transfer files between your device and other MTP compatible devices such as computer, using a Wi-Fi connection. But before you can transfer files wirelessly, you will need to pair both devices.
Note: You will need a Wi-Fi enabled devices that supports Media transfer such as a computer running Microsoft, Windows Vista orWindows 7.
To pair your device with the computer:
These steps will work only on Windows 7 OS and the computer is connected to the Wi-Fi Access point via network cable.
To connect paired devices wirelessly in Media Transfer Mode:
If you want to disconnect, just tap on the paired device and tap Disconnect.
If you want to remove the paired device, tap on the paired device you want to remove and select Forget.
How to Add a Shortcut on Sony Xperia Z2 Tablet Homescreen
Just like a desktop, it also works best on any smartphones to add a shortcut on a homescreen. This r somehow makes navigation, especially to important files/apps, more accessible. Its less hassle and less tapping. Sony Xperia Z2 Tablet definitely allows you to make your device experience stress-free by adding a shortcut to important apps on your homescreen. Heres how to do it.
1. On your devices homescreen, touch and hold and empty area until the device vibrates.
2. After doing so, tap on Apps.
3. Then go to Shortcuts and select a shortcut.
4. Or another option, just go directly to the Application screen and touch and hold the application.
How to Add and Resize Widgets on Sony Xperia Z2 Tablet
Adding Widgets on your Homescreen will help you improve your productivity in using your Sony Xperia Z2 Tablet. If you dont know what widgets means, Widgets are small applications that you can directly use on your Homescreen. These will serve as your shortcut icon so will no longer need to access your Menu.
Follow these steps on how to add widgets on your Homescreen.
How to resize a Widget:
How to Change Time & Date on Sony Xperia Z2 Tablet
In some devices you can only change the Timezone and not the specific time and date. But in Sony Xperia Z2 Tablet, you have an option whether to set the time in automatic or to manually set the time.
Follow these steps on how to change the time and date on your device:
To manually set the date:
To manually set the time:
If you want to change the timezone:
How to Link Duplicate Contacts on Sony Xperia Z2 Tablet
Duplicate contacts usually happens when you import your old contacts to your new device or when you synchronize your contacts with the other account. On your Sony Xperia Z2 Tablet, you can avoid dupicate contacts and instead link these two to create a single entry. If you happen to link two contacts by mistake, you can separate them again. Heres how you can link two contacts.
1. On your devices homescreen, tap on .
.
2. Tap on and tap the contact you want to link with another contact.
3. Press on and tap Link contact.
4. And tap the contact whose information you want to be linked with the first one. Tap OK to confirm. The first contact no longer appears on your contact list but is merged with the second contact.
Now if you mistakenly linked two contacts
1. Tap on on your homescreen and then tap on.
2. Then tap on the linked contact you want to edit.
3. And tap on . Tap on Unlink contact on the list and tap on OK to confirm.
How to Transfer Contacts from Sim Card or Memory Card to Sony Xperia Z2 Tablet
Contacts is very important for everyone of us. We cant connect to our friends without a contact number. If you have a new phone, saving contacts on the phone one by one is so hassle. But if you have save your contacts on a Sim Card or Memory Card, then you can transfer your contacts from your SIM Card or Memory Card to your Sony Xperia Z2 Tablet.
How to transfer contacts from a SIM card to your Xperia Z2 Tablet:
How to transfer contacts from a memory card to your Xperia Z2 Tablet:
How to Import Contacts From Old Phone to New Phone (on Sony, iPhone, Samsung, HTC and Nokia)
Read More..
We have our own reasons why we factory reset our device. Maybe we want to delete all the files and restore the device to its original state. It could also be the device may be malfunctioning or so slow and it needs to be reset.
Restoring the default settings or factory reset your Sony Xperia Z2 tablet will delete all your files. It is recommended to backup your important files on your computer before attempting to reset your device.
There are two ways on how to reset your Sony Xperia Z2 tablet. One is to erase everything, wiping your files and restoring the default settings. The other one is to reset the device without deleting your personal data.
How To Reset Your Sony Xperia Z2 (Erasing All Your Files):
- On your Home screen, tap Apps icon.
- Go to Settings, and select Backup & reset.
- Tap on Factory data reset.
- Then Reset tablet.
- Confirm by tapping Erase everything. You just need to wait while your phone deleting your files and restoring your settings to default.
How To Reset Without Erasing Your Personal Data:
- On your Home screen, tap Apps icon.
- Go to Settings, and select Backup & reset.
- Tap on Settings reset.
- Then Reset tablet.
- Confirm by tapping Reset settings.
- Wait while your phone restoring your settings.
Warning: To avoid permanent damage to your device, do not restart your device while a reset procedure is underway.
How to Set Up Voicemail Service on Sony Xperia Z2 Tablet
Voicemail services depends on your subscription plan with your service provider. This feature allows caller to leave voice messages on your phone whenever you cant pick up. Your voicemail number may be found on your sim card or you can get it directly from your service provider. Here are the steps to set up voicemail service on Sony Xperia Z2 tablet.
To set up your voicemail number:
1. On your devices homescreen, tap on Menu icon to enter your voicemail number.
2. Go to Settings menu.
3. Select Call Settings and choose Voicemail Settings.
4. Tap on Voicemail number so you can enter your designated voicemail service number.
5. And lastly tap on OK.
To call your voicemail service number:
1. On your homescreen, tap on the Menu icon.
2.Look for Phone and tap it.
3. And touch and hold for seconds the number 1.
Voicemail services depends on your subscription plan with your service provider. This feature allows caller to leave voice messages on your phone whenever you cant pick up. Your voicemail number may be found on your sim card or you can get it directly from your service provider. Here are the steps to set up voicemail service on Sony Xperia Z2 tablet.
To set up your voicemail number:
1. On your devices homescreen, tap on Menu icon
to enter your voicemail number.2. Go to Settings menu.
3. Select Call Settings and choose Voicemail Settings.
4. Tap on Voicemail number so you can enter your designated voicemail service number.
5. And lastly tap on OK.
To call your voicemail service number:
1. On your homescreen, tap on the Menu icon
.2.Look for Phone and tap it.
3. And touch and hold for seconds the number 1.
Battery Life depends on how you use your device. For your Sony Xperia Z2 Tablet device, if you want to save your battery to last longer hours, you may need to adjust your settings. Follow these suggestions:
• Turn on the power-saving option on the device. Then lessen the screen brightness and the screen lock timeout. On the Homescreen, tap on Menu icon. Select Settings > Power management.
- Use the Stamina mode and Low battery mode features.
- To activate the STAMINA mode: While you are in the Power management, tap on Point icon next to STAMINA mode, then tap Activate.
• Turn down your device volume with the volume keys.
• Close any apps or features when you are done using it so they will not continuously running in the background.
• Turn off the network connection if you are out of range so that your device will stop searching for a network signal. To turn off the network go to Settings and turn off the Bluetooth and Wi-Fi.
• You should use the latest version of the software update. Software updates improves some features and fixes some bugs on the previous software version.
• Adjust your brightness level to low.
• Turn off the camera flash.
• If you have any live wallpaper, Disable it.
• Set the synchronization application to manual. You can also choose the automatic, but increase the synchronization intervals.
• If you want to listen to music, use the Sony original hands free device. It demand less battery power than your devices own loudspeakers.
Wouldnt it be nice if youre phone automatically plays your song list right when you step in your car? Or what about letting you show your whole day agenda the moment you arrive at your work table between 8-9am? These are just examples on how Sony Xperia Z2 Tablets Smart Connect app works. With this app, you can set an event to happen on your device at certain times or what will happen when you connect/disconnect accessories like headset or charger. Hereshow to use it.
1. On your devices home screen, tap on Menu icon
2. Look for Smart Connect and tap on it.
3. If its your first time opening the said app, tap on OK to close the introduction screen.
4. Go to Events tab and tap on the plus (+) icon.
5. If you are creating an event for the first time, tap OK again to close the introduction screen.
6. Add conditions under which you want to trigger the event. A condition could be the connection with an accessory, or a specific time interval, or both.
7. Tap Right Arrow icon to continue.
8. Add what you want to happen when you connect an accessory, and set other settings as desired.
9. Tap Right Arrow icon to continue.
10. Set an event name, then tap Finish.
Transferring files in Sony Xperia Z2 Tablet is now made easy by using the Media Transfer Mode. You can easily transfer files between your device and other MTP compatible devices such as computer, using a Wi-Fi connection. But before you can transfer files wirelessly, you will need to pair both devices.
Note: You will need a Wi-Fi enabled devices that supports Media transfer such as a computer running Microsoft, Windows Vista orWindows 7.
To pair your device with the computer:
- Check if the media transfer mode of your device is enabled. It is normally enabled by default.
- Using the USB cable, connect your device to a computer.
- On your computer, once the name of your device appear, click on Network Configuration and just follow the steps on how to pair the computer.
- After pairing, safely disconnect your device from your computer.
These steps will work only on Windows 7 OS and the computer is connected to the Wi-Fi Access point via network cable.
To connect paired devices wirelessly in Media Transfer Mode:
- First things first, check if the media transfer mode is enabled.
- On your Home screen, tap on the Menu icon.
- Select Settings > Xperia > USB connectivity.
- Then tap the paired device that you want to connect to under Trusted devices.
- Tap connect.
If you want to disconnect, just tap on the paired device and tap Disconnect.
If you want to remove the paired device, tap on the paired device you want to remove and select Forget.
How to Add a Shortcut on Sony Xperia Z2 Tablet Homescreen
Just like a desktop, it also works best on any smartphones to add a shortcut on a homescreen. This r somehow makes navigation, especially to important files/apps, more accessible. Its less hassle and less tapping. Sony Xperia Z2 Tablet definitely allows you to make your device experience stress-free by adding a shortcut to important apps on your homescreen. Heres how to do it.
1. On your devices homescreen, touch and hold and empty area until the device vibrates.
2. After doing so, tap on Apps.
3. Then go to Shortcuts and select a shortcut.
4. Or another option, just go directly to the Application screen and touch and hold the application.
Adding Widgets on your Homescreen will help you improve your productivity in using your Sony Xperia Z2 Tablet. If you dont know what widgets means, Widgets are small applications that you can directly use on your Homescreen. These will serve as your shortcut icon so will no longer need to access your Menu.
Follow these steps on how to add widgets on your Homescreen.
- Tap and hold an empty area on your Home screen until your device vibrates.
- There should an option appear, tap on Widgets.
- Select the widget and tap on it you want to add.
- There are some widgets that are resizeable, you can expand them to view the content more on your Homescreen.
How to resize a Widget:
- Tap and hold the widget you want to resize until it magnifies and the device vibrates. You can tell if the widget is resizeable if the highlighted frame and resizing dots appear.
- You just need to Drag the dots for your preferred size.
- Then tap anywhere on the Homescreen to confirm the new size of the widget.
How to Change Time & Date on Sony Xperia Z2 Tablet
In some devices you can only change the Timezone and not the specific time and date. But in Sony Xperia Z2 Tablet, you have an option whether to set the time in automatic or to manually set the time.
Follow these steps on how to change the time and date on your device:
To manually set the date:
- On your Home screen, tap the Menu icon.
- Select Settings, then tap Date & Time.
- You need to uncheck the Automatic date & time. If it is set to automatic.
- Then tap on Set date, and adjust the date by scrolling up and down.
- To confirm the changes, tap Done.
To manually set the time:
- On your Home screen, tap the Menu icon.
- Select Settings, then tap Date & Time.
- You need to uncheck the Automatic date & time. If it is set to automatic.
- Then tap on Set time, and adjust the time by scrolling up and down.
- To confirm the changes, tap Done.
If you want to change the timezone:
- On your Home screen, tap the Menu icon.
- Select Settings, then tap Date & Time.
- You need to uncheck the Automatic date & time. If it is set to automatic.
- Then tap on Select time zone.
- Find your preferred time zone in the option.
Duplicate contacts usually happens when you import your old contacts to your new device or when you synchronize your contacts with the other account. On your Sony Xperia Z2 Tablet, you can avoid dupicate contacts and instead link these two to create a single entry. If you happen to link two contacts by mistake, you can separate them again. Heres how you can link two contacts.
1. On your devices homescreen, tap on
.2. Tap on
and tap the contact you want to link with another contact.3. Press on
and tap Link contact.4. And tap the contact whose information you want to be linked with the first one. Tap OK to confirm. The first contact no longer appears on your contact list but is merged with the second contact.
Now if you mistakenly linked two contacts
on your homescreen and then tap on.2. Then tap on the linked contact you want to edit.
3. And tap on
. Tap on Unlink contact on the list and tap on OK to confirm.How to Transfer Contacts from Sim Card or Memory Card to Sony Xperia Z2 Tablet
Contacts is very important for everyone of us. We cant connect to our friends without a contact number. If you have a new phone, saving contacts on the phone one by one is so hassle. But if you have save your contacts on a Sim Card or Memory Card, then you can transfer your contacts from your SIM Card or Memory Card to your Sony Xperia Z2 Tablet.
How to transfer contacts from a SIM card to your Xperia Z2 Tablet:
- On your devices homescreen, tap on the Menu icon .
- Then tap on the Person icon or Contacts.
- Press the Three Vertical Dots, and select Import contacts > SIM card.
- If you have set up a synchronization account, then you can choose to add the SIM card contacts under that account. Or you may choose to only use the contacts on your device.
- If you want to import all the contacts, tap Import all.
- If you want to select which contact to transfer, you just need to find and tap on the contact.
How to transfer contacts from a memory card to your Xperia Z2 Tablet:
- On your devices homescreen, tap on the Menu icon .
- Then tap on the Person icon or Contacts.
- Press the Three Vertical Dots, and select Import contacts > SD card.
- Choose the option you preferred if you have set up a synchronization account. Whether to add the imported contacts under that account or on your device.
- If you have more than one vCard file on the SD card, there should be a list appear on the different batches of contacts. Just select the batch you want to import.
How to Import Contacts From Old Phone to New Phone (on Sony, iPhone, Samsung, HTC and Nokia)
Contacts is very important for everyone of us. We cant connect to our friends without a contact number. If you have a new phone, saving contacts on the phone one by one is so hassle. But now, theres an easy way how to transfer or import your contacts from your old phone to your new phone.
Use your PC to transfer contacts to your new phone. This process is applicable in several phone brands, including iPhone, Samsung, HTC and Nokia.
You just need an Internet Connection on your PC, your old and new phone and their own USB cable.
If you are not prompted with a pop-up window to install the PC Companion, you can also download the PC Companion here.
How to Screen Mirror Sony Xperia Z2 Tablet to Show the Screen on a TV
The Screen Mirroring will allow you to show the screen of your device on a TV or other large display without using a cable connections. It uses the Wi-Fi Direct technology that create a wireless connection between two devices. You can also use this feature to listen to music from your phone via the TVs speakers.
How to mirror the screen of your tablet on a TV:
1. First you need to turn on the screen mirroring function on your TV. Just follow the instructions in the User Guide of your TV.
2. From your Home screen, tap on the Menu icon
3. Select on Settings, and tap Xperia™.
4. Choose Screen mirroring.
5. Tap to turn on the Screen mirroring and select a device.
Note: The TV that you want to connect with must support screen mirroring for the above described functionality to work. If it does not support, then you can try the Throw feature. Go to Settings > Throw feature.
How to Activate Camera App and Play Tracks on a Lockscreen on Sony Xperia Z2 Tablet
Lockscreens dont normally allow users to launch any apps or even take photos. We still need to unlock our screens to use certain apps on our handset. But with Sony Xperia Z2 Tablet, you can take photos, record videos and play tracks without unlocking the screen. Heres how you can enjoy this feature on your Sony Xperia Z2 Tablet.
To take a photo on a lockscreen
1. Activate first your screen by briefly pressing the power key
2. Now activ the camera app by dragging the camera icon to the left across the screen.
3. And tap to take photos or record videos without unlocking your screen.
To play an audio on a lockscreen
1. Activate first your screen by briefly pressing the power key.
2. Now to display the music player controls, drag to the right across the screen.
3. And tap to play a track on a lockscreen.
To pause an audio track from the lockscreen
1. Activate first your screen by briefly pressing the power key.
2. When the music player controls appear, tap to pause the track.
To change the currently playing audio track on a lockscreen
1. Activate first your screen by briefly pressing the power key.
2. Then tap or
or when the music player controls appear.
How to Share Contacts Using NFC on Sony Xperia Z2 Tablet
How to Turn on Mobile Bravia Engine on Sony Xperia Z2 Tablet
How to Hard Reset Sony Xperia Z2 Tablet Using Buttons
We have our own reasons why we hard reset our device. Maybe we want to delete all the files and restore the device to its original state. It could also be the device may be malfunctioning or so slow and it needs to be reset.
Restoring the default settings or factory reset your Sony Xperia Z2 Tablet will delete all your existing files. It is recommended to backup your important files on your computer before attempting to reset your device.
1. If your phone is turned off, just press and hold the Volume Up and Volume Down buttons.
2. Then press and release the Power button (just keep on holding the volume buttons). There should a menu will appear on your phone.
3. Press the Volume down button to navigate to the Recovery option. Press the Volume Up to select (if that doesnt work, use the Power button to select).
4. An Android logo will appear. Press the Volume Down and Volume Up button together and a recovery menu should appear. Use the Volume buttons to move to the Wipe data/Factory reset option and then press Power to select.
5. Use the Volume Down key to choose Yes and press the Power button again to select.
Use your PC to transfer contacts to your new phone. This process is applicable in several phone brands, including iPhone, Samsung, HTC and Nokia.
You just need an Internet Connection on your PC, your old and new phone and their own USB cable.
Then you need to install the PC Companion program. This is a free application and the installation files are already saved on your new phone. This program can also be used in updating your phone software.
Please note that if you are using the Microsoft Windows 7 operating system on your PC, make sure that the AutoPlay setting is enabled.
To check your settings:
Click Start > Control Panel, then type "autoplay" on the search box. Click the AutoPlay, and mark the check box Use AutoPlay for all media and devices.
Installing the PC Companion:
Installing the PC Companion:
- Turn on your new Phone and connect it to your PC.
- On your new Phone, tap "Install" to install PC Companion on the PC.
- On your computer, if a pop-up window that appears notifies you about available PC Software, select Run Startme.exe.
- Then click Install to start the installation and then follow the instructions to complete the installation.
If you are not prompted with a pop-up window to install the PC Companion, you can also download the PC Companion here.
Transferring your contacts to your new phone:
- Make sure that PC Companion is installed on your PC.
- Open the PC Companion application on your PC.
- Then click Contacts Setup and follow the instructions to transfer your contacts.
How to Screen Mirror Sony Xperia Z2 Tablet to Show the Screen on a TV
The Screen Mirroring will allow you to show the screen of your device on a TV or other large display without using a cable connections. It uses the Wi-Fi Direct technology that create a wireless connection between two devices. You can also use this feature to listen to music from your phone via the TVs speakers.
How to mirror the screen of your tablet on a TV:
1. First you need to turn on the screen mirroring function on your TV. Just follow the instructions in the User Guide of your TV.
2. From your Home screen, tap on the Menu icon
3. Select on Settings, and tap Xperia™.
4. Choose Screen mirroring.
5. Tap to turn on the Screen mirroring and select a device.
Note: The TV that you want to connect with must support screen mirroring for the above described functionality to work. If it does not support, then you can try the Throw feature. Go to Settings > Throw feature.
How to Activate Camera App and Play Tracks on a Lockscreen on Sony Xperia Z2 Tablet
Lockscreens dont normally allow users to launch any apps or even take photos. We still need to unlock our screens to use certain apps on our handset. But with Sony Xperia Z2 Tablet, you can take photos, record videos and play tracks without unlocking the screen. Heres how you can enjoy this feature on your Sony Xperia Z2 Tablet.
To take a photo on a lockscreen
1. Activate first your screen by briefly pressing the power key
2. Now activ the camera app
by dragging the camera icon to the left across the screen.3. And tap
to take photos or record videos without unlocking your screen.To play an audio on a lockscreen
1. Activate first your screen by briefly pressing the power key
.2. Now to display the music player controls, drag
to the right across the screen.3. And tap
to play a track on a lockscreen.To pause an audio track from the lockscreen
1. Activate first your screen by briefly pressing the power key
.2. When the music player controls appear, tap
to pause the track.To change the currently playing audio track on a lockscreen
1. Activate first your screen by briefly pressing the power key
.2. Then tap
orwhen the music player controls appear.How to Share Contacts Using NFC on Sony Xperia Z2 Tablet
NFC feature is a must-have for any smartphones these days. Near-field communication or NFC works similarly like bluetooth. By touching your NFC-enabled phones against each other, you can then share contacts, music and photos. Well, heres how you can easily share contacts on Sony Xperia Z2 Tablet uisng NFC feature.
1. On your device, enable content sharing in Settings.
2. Then go to Wireless and Networks.
3 And choose on More menu.
When the phone vibrates, tap the onscreen message that says "touch to beam".
Mobile Bravia Engine is a pre-installed technology on Sony Xperia Z2 Tablet which allows you to view photos and videos in a clearer, sharper and more natural way. This technology might consume more battery but its worth it when you use it to view images in a nicer way. Heres how you can turn on Mobile Bravia Engine on Sony Xperia Z2 Tablet.
1. On your devices homescreen, tap .
.
.2. Then find and tap Settings.
3. Go to Display.
4. And mark the Mobile BRAVIA Engine 2 checkbox if its not marked.
Now youre ready to view those captured moments in a clearer, sharper and more natural way.
How to Add a Geotag on a Photo on Sony Xperia Z2 Tablet
How to Add a Geotag on a Photo on Sony Xperia Z2 Tablet
Adding a location to those photos somehow adds relevance and it gives you that flashback of memories when you view those nicely captured moments. Well, this feature is not new any longer since its been there online and you often use them on photo-filtered websites. But with Sony Xperia Z2 Tablet, you can now add geotags on your photos right on your handset. Heres how you can add geotag on your photos.
1. Open your photo gallery on your device.
2. When youre viewing a photo, just tap the screen and the toolbars will display.
3. Now tap to open the map screen.
4. Find and tap the desired location to put the map on the photo.
5. To adjust the location of the photo, just tap the location on the map to where you want to move the photo.
6. Tap OK when youre done and to save the geotag. You can then return to the photo viewer screen.
1. Open your photo gallery on your device.
2. When youre viewing a photo, just tap the screen and the toolbars will display.
3. Now tap
to open the map screen.4. Find and tap the desired location to put the map on the photo.
5. To adjust the location of the photo, just tap the location on the map to where you want to move the photo.
6. Tap OK when youre done and to save the geotag. You can then return to the photo viewer screen.
How to Hard Reset Sony Xperia Z2 Tablet Using Buttons
We have our own reasons why we hard reset our device. Maybe we want to delete all the files and restore the device to its original state. It could also be the device may be malfunctioning or so slow and it needs to be reset.
Restoring the default settings or factory reset your Sony Xperia Z2 Tablet will delete all your existing files. It is recommended to backup your important files on your computer before attempting to reset your device.
1. If your phone is turned off, just press and hold the Volume Up and Volume Down buttons.
2. Then press and release the Power button (just keep on holding the volume buttons). There should a menu will appear on your phone.
3. Press the Volume down button to navigate to the Recovery option. Press the Volume Up to select (if that doesnt work, use the Power button to select).
4. An Android logo will appear. Press the Volume Down and Volume Up button together and a recovery menu should appear. Use the Volume buttons to move to the Wipe data/Factory reset option and then press Power to select.
5. Use the Volume Down key to choose Yes and press the Power button again to select.
Subscribe to:
Posts (Atom)
